Pine Cone Flowers
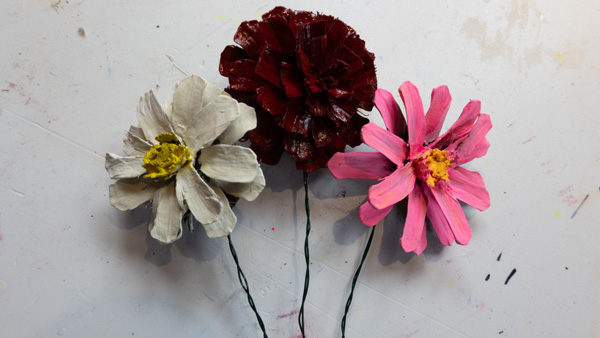
Turn a pile of dried pine cones into a bouquet of blooms! Pine cones can be turned into zinnias, coneflowers, and roses using garden tools, such as cultivation scissors and ratcheting pruning shears. The types of pine cones you can find dictate the flowers you can create.
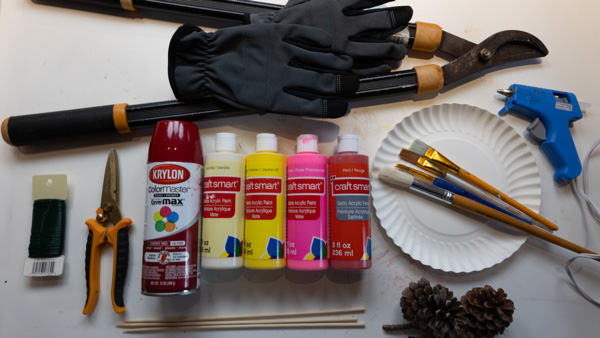
Materials:
- Pine cones
- Cultivation scissors
- Ratcheting pruning shears
- E6000 brand of quick-drying glue
- Polyurethane spray (satin or gloss)
- Acrylic paint or spray paint
- Paintbrushes or foam brushes
- Hot glue gun and glue sticks
- Floral wire or wooden stems (optional)
- Paper plate (to use for paint)
Instructions:
Step 1: Prepare the pine cones. If needed, make sure the pine cones are clean and ready to use. If they have dirt or are closed, place them on a foil-lined baking sheet and bake them at 200°F (93°C) for about 30 minutes. This helps them open fully.
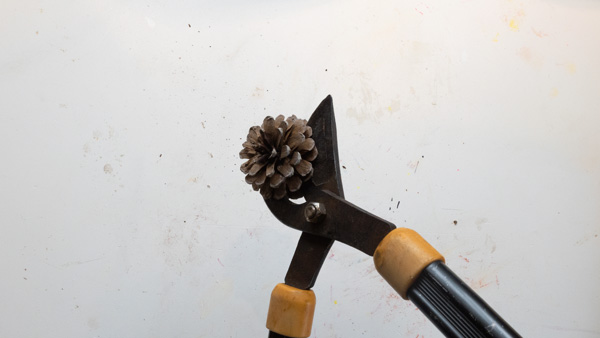
Step 2: Trim the pine cones. Be careful cutting the pine cones, as they can be challenging. This step is crucial because it determines the final look of your blooms.
Choosing the Right Pine Cone:
- Select pine cones that are fully opened for a more natural petal-like appearance.
- The pine cone should have a rounded shape rather than an elongated one, which will resemble a flower better.
Trimming the Base:
- Using wire cutters, pruning shears, or heavy-duty scissors, carefully snip off the bottom layers of the pine cone.
- Cut just above the widest point of the cone’s base to create a flat surface. This will allow your flower to sit correctly when displayed.
- If your pine cone is thick at the bottom, you may need to trim a few layers upward until you get a pleasing shape.
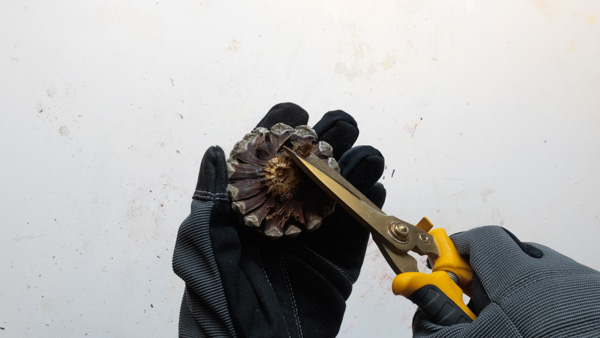
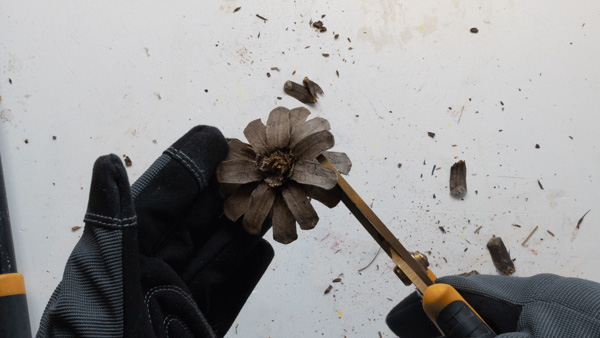
Shaping the Petals:
- Look at the pine cone from above—this will be the top of your flower.
- If the outer “petals” (scales) seem too large, you can carefully snip off the tips with scissors to give them a softer, rounded look.
- For a rose-like appearance, remove additional layers from the bottom so that the cone has a wider, more open look at the top.
- If you prefer a daisy-like shape, leave more layers intact and focus on evenly trimming the edges.
(Tip: Cut in small sections and check frequently to avoid trimming too much!)
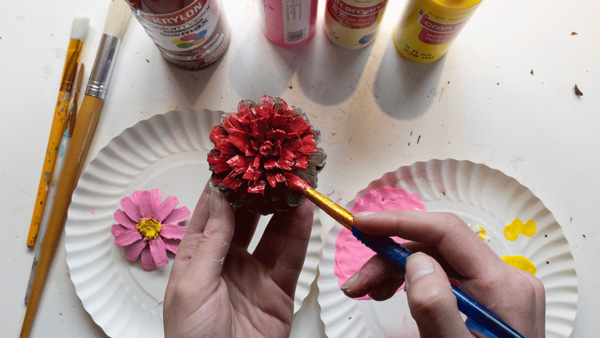
Step 3: Paint the Pine Cones. You can choose a solid color, blend an ombre effect, or use a dry-brush technique for a rustic look.
- Full Coverage: Paint the entire pine cone for a bold, vibrant flower.
- Ombre Effect: Apply a darker shade at the base and gradually lighten toward the tips.
- Dry Brush: Lightly dab a contrasting color on the edges for a more natural, textured appearance.
(Tip: Let the paint dry completely before handling.)
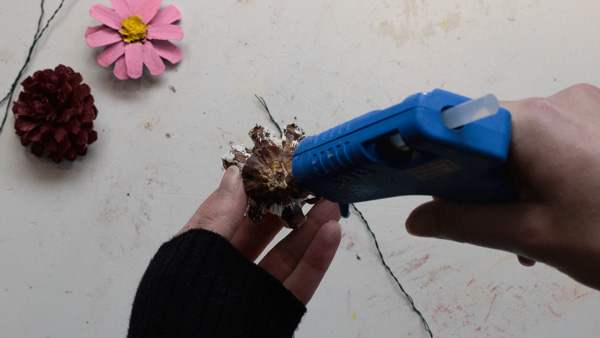
Step 4: Attach Stems. If you plan to create a bouquet or floral arrangement, attach floral wire or wooden stems. Simply add a drop of hot glue to the base and press the wire or stem firmly in place. Wooden stems can be created using thin dowels or sticks.
Further Learning and Discussion Questions:
- Discussion questions for reflection:
a) Nature & Creativity: How does working with natural materials like pine cones inspire creativity differently than working with store-bought craft supplies?
b) Symbolism in Art: Flowers are often used to symbolize different emotions and meanings in art and culture. What emotions or messages do your pine cone flowers convey?
- Further Learning
– What’s Inside a Pine Cone. Winter is Alive! SciShow Kids
https://www.youtube.com/watch?v=c3m9d9n8kvc
This resource explains the biological function of pine cones, including how they open and close based on humidity to protect and disperse seeds. It’s a great way to integrate natural science into this craft activity.