Nature Hunt Viewfinder
Get kids ready to dive into the great outdoors and unleash their inner explorer with a Nature Viewfinder! Blend creativity, nature appreciation, and science at home or with us in-person to craft a nature viewfinder to frame picturesque scenes.
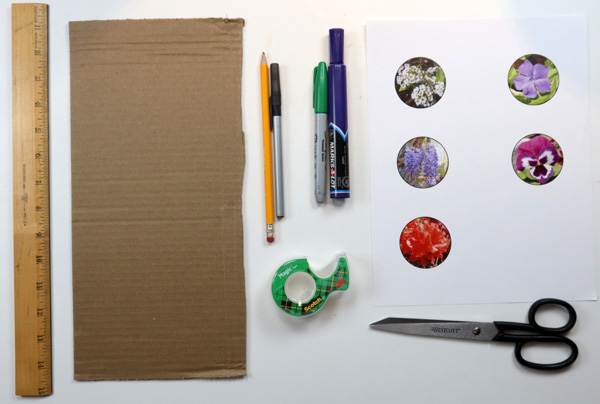
Materials:
- Cardboard
- Scissors
- Glue or Tape
- Markers or Crayons
- Photos or Printed Images (of the category of objects you want to feature, such as clouds, birds, plants, etc.)
- Optional: Pen, pencil, and ruler
Step 1: Gather your materials. Make sure you have enough cardboard and images for your viewfinder.
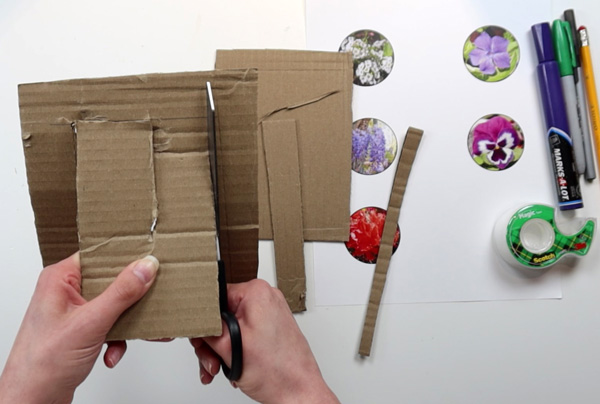
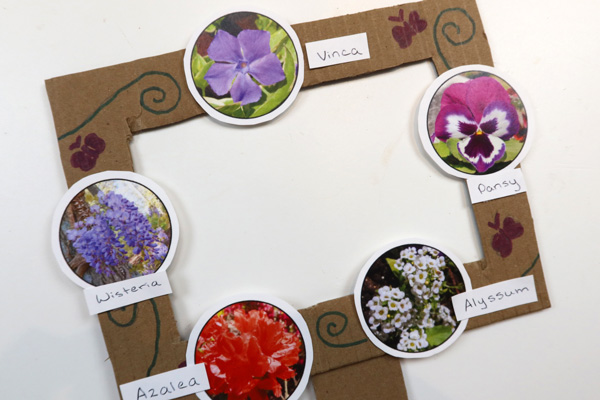
Step 2: Cut out the viewfinder frame. Using the scissors, cut out a rectangular frame from the cardboard. The size of the frame will depend on how big you want your viewfinder to be. A typical size is around 6 by 4 inches.
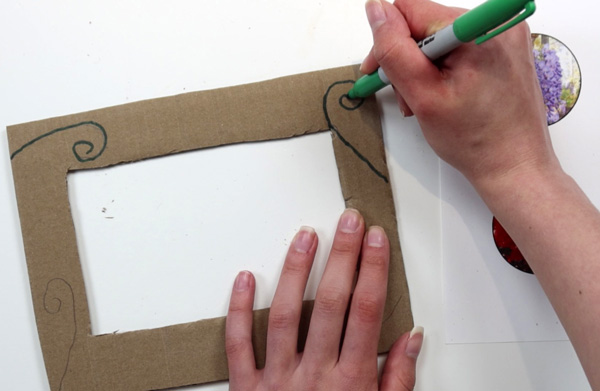
Step 3: Decorate the frame. Use markers or crayons to decorate the border of the frame. If you’re making a cloud viewfinder, you could draw fluffy clouds all around the edges. If it’s a bird viewfinder, draw trees, nests, and feathers. Let your imagination soar!
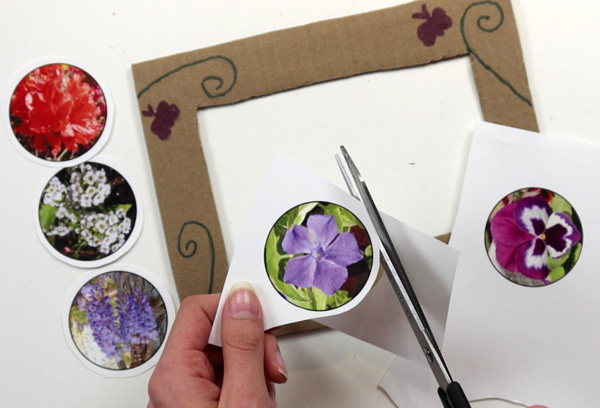
Step 4: Attach the images. Take your printed images of the category of objects you want to feature (clouds, birds, flowers, etc.). Cut them out neatly, leaving a small border around each image. Then, using glue or tape, attach these images to the cardboard frame.
Step 5: Label the images. Under each image, write the name of the object it represents. For example, if you have a picture of a cumulus cloud, write “Cumulus” underneath it. This will help you learn about the different types of objects when you are out in nature.
Step 6: Optional: Add a handle to make it easier to hold and use the viewfinder. Cut a small strip of cardboard and glue or tape it to the back of the frame, leaving enough space for fingers to grip comfortably.
Step 7: Explore Nature! Head outside and explore with your viewfinder! Look through the viewfinder and see if you can spot the objects featured on the border. It’s a great way to engage with nature and learn about different elements of the environment.
Ideas to take nature hunt viewfinders to the next level:
- Interactive Flaps: Instead of simply gluing or taping the images onto the cardboard frame, attach them with small flaps that lift to reveal additional information about each object. Underneath the flap, you could include facts and fun trivia.
- Nature Journal Integration: Keep a nature journal alongside your viewfinder adventures. Use the viewfinder to identify and observe different objects in nature, then record your observations, sketches, or reflections in the journal. This promotes scientific inquiry and encourages a deeper connection with the natural world.
Learning and Discussion Questions:
1. Field Guide Exploration: Visit your local library or bookstore to search for field guides related to the category of objects featured in your viewfinder. For example, if it’s a bird viewfinder, search for a bird field guide. Use the viewfinder to identify birds in the wild, and then use the field guide to learn more about their characteristics, habitats, and behaviors.
2. Outdoor Sketching: Bring sketchbooks and pencils to sketch the objects observed through the viewfinder. This activity promotes artistic expression, attention to detail, and observation skills. Discuss what you observe!
3. Observation Skills: What did you notice when you looked through the viewfinder? How did using the viewfinder change the way you observed nature?
4. Object Identification: Can you name the objects you saw through the viewfinder? Did you learn any new names of objects today?
5. Environmental Awareness: Why do you think it’s important to learn about these objects in nature? How can understanding these objects help us take care of the environment?
WheatonArts Family Art Workshop video tutorials are presented by PNC Arts Alive!