Layered Landscapes
Step into an imaginative world of depth and creativity! In this workshop, we explore the concept of creating depth in artwork by focusing on foreground, middle ground, and background. Simple materials, such as cardboard and patterned paper are the main materials used to build layers of landscape elements. The cardboard will serve as the base for the scene, while the patterned paper will add texture and visual interest to each layer. The finished project is a dimensional landscape artwork to display proudly in your favorite space.
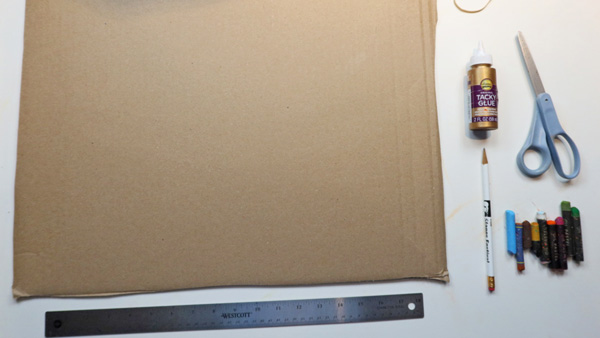

Materials:
- Cardboard/Cardstock
- Oil Pastels
- Craft Glue
- Ruler (optional)
- Scissors/Utility Knife
- Rubber Band
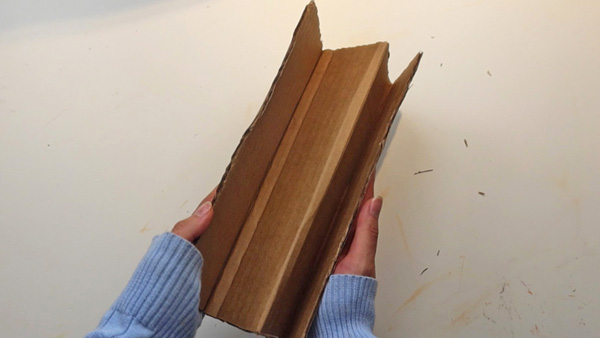
Step 1: Fold a piece of cardboard into an accordion-style fold. Your goal is to have at least three or four panels.
These panels will create a foreground, middleground, and background. If you do not have cardboard you can use cardstock or poster board. Since cardboard is a rigid material and you will want to achieve equal folds on your first attempt, it is best to use a ruler to measure the panels prior to folding.
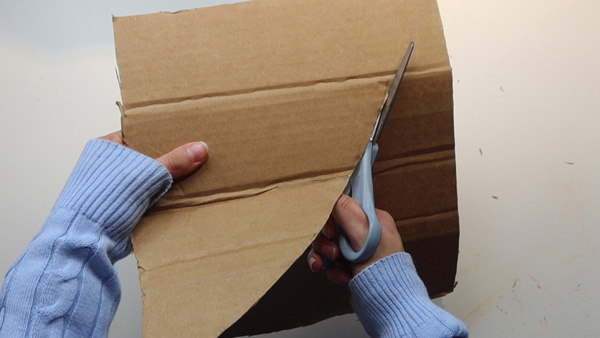
Step 2: Open the folds and use a pencil to sketch a diagonal, sloping line from the lower right corner to the upper left corner. The goal is to create three to four visible layers when the cardstock/cardboard is folded. Cut along this layer using scissors or a utility knife. Set aside the scrap pieces. These will be used for landscape elements.
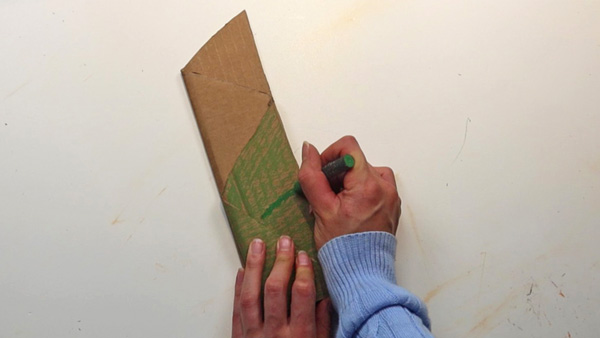
Step 3: Fold the cardboard and get a sense of which sides of each layer is visible. Since the material is rigid, use a thin rubber band at the base to keep the folds together while also having a slight gap between the layers. This can be covered up with additional landscape elements as we work through the project.
Step 4: Using oil pastels apply base colors for the design. You may want to unfold and refold the layers as you apply color. Think of this as a stage set. You want to begin with the broad, majority of colors and slowly add layers to build a landscape. The layer that is farthest away (background) will likely be your sky layer. The one or two layers in the middle (middleground) may be mountains, a forest, or a distant meadow. The layer that is closest to you (foreground) will be the grass, snow, desert sand, et cetera, that is directly in front of you.
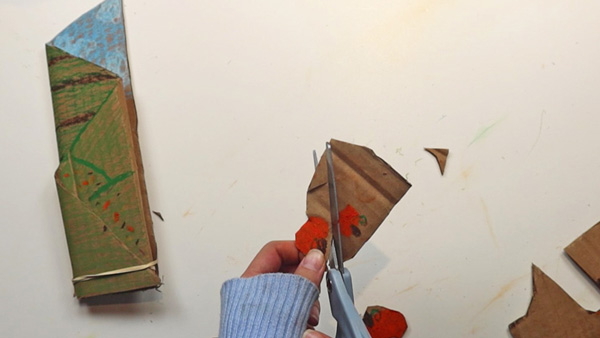
Step 5: Using the scrap pieces, cut trees, people, mountains, flowers, et cetera. Cut a variety of sizes. For instance, cut out small trees and large trees. Use oil pastels to add color to these objects.
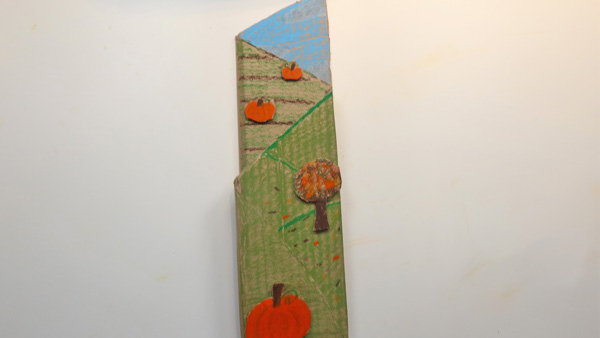
Step 6: Once you have your pieces cut and colored insert them into your multi-level landscape using craft glue. Remember to consider the phenomenon of apparent size. The concept of apparent size combines math and science to explain why objects in the distance appear smaller in size. If you place an object on the panel that is closest to you the size would be large. If you place the same object on the panel that is the furthest away, you would scale down the object.
Further Learning and Discussion Questions:
Discussion questions for reflection:
– What inspired the design of your layered landscape?
– How did you decide what objects or features to place in the foreground, middleground, and background?
– Can you explain how the concept of apparent size influenced your placement of objects in the landscape?
– Which part of your landscape did you find most challenging to create, and how did you overcome that challenge?
– How does the layered landscape model help you understand the difference between the foreground, middleground, and background compared to a 2D drawing?
– If you were to add more details to your landscape, what would you include, and where would you place them?
– What did you learn about how artists create a sense of depth in their work through this project?
Further Learning:
View these videos to learn more about apparent size.
https://www.youtube.com/watch?v=wjoPVTelpLc
https://www.youtube.com/watch?v=csYSuiSFUpA
View these videos to learn more about foreground, middleground, and background.
https://www.youtube.com/watch?v=q75cDS-ZnbQ
https://www.youtube.com/watch?v=fU0n7t4VrPo
WheatonArts Family Art Workshop video tutorials are presented by PNC Arts Alive!