Kirigami Winter Trees
We are all familiar with the paper folding techniques known as origami, but have you tried kirigami? Kirigami is a variation of Japanese origami art that adds cutting techniques alongside the folding of paper to create objects or designs. Follow along with our tutorial to practice making a three-dimensional kirigami tree, great for seasonal decor, ornaments, and standing cards!
Materials:
- Origami or Scrapbook Paper
- Scissors


Step 1: Choose a piece of decorative paper, origami paper for making small trees, or scrapbook paper for larger trees. Here we are using 12×12 inch scrapbook paper to make 6-inch tall trees.
Step 2: Face the paper white/blank side up on the surface. Fold the paper in half from edge to edge and then open it. Do this again in the opposite direction. Fully open the paper and fold it diagonally, point to point, in both directions.
Step 3: Fully open the paper with the white side facing up. Orient the paper in a diamond shape. Using the crease you previously made, bring the top three corners to meet at the bottom corner. Press the creases flat. The paper should now be in the shape of a diamond.
Step 4: Fold the side flaps in to meet at the center crease. It may be hard to see the crease in the center. Use your fingertip to locate the crease, and repeat on the other side.
Step 5: Flip the paper over and repeat with the other two flaps on the opposite side. It should now look like an upside-down kite.
Step 6: Open one of the flaps that were just folded. Place your finger on the outer edge and collapse it inwards by folding it into the center. This motion will reverse the fold. Repeat on the other side.
Step 7: Flip the paper over and repeat the previous step with the flaps on this side.
Step 8: Take the bottom corner of the kite and fold it upwards. When you fold this flap, you will see the folded paper on the layer beneath the top layer. This fold will act as a guide for the next step.
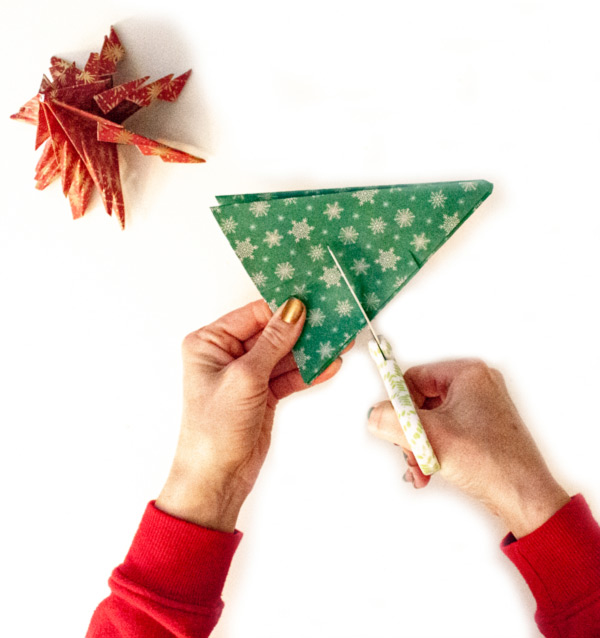
Step 9: Cut all layers of paper along the bottom fold just created. This action will cut the bottom triangle off of the kite. A triangle will remain.
Step 10: Next, cut three horizontal lines on each side of the triangle, creating the branches. If needed, sketch the lines with a marker prior to cutting.
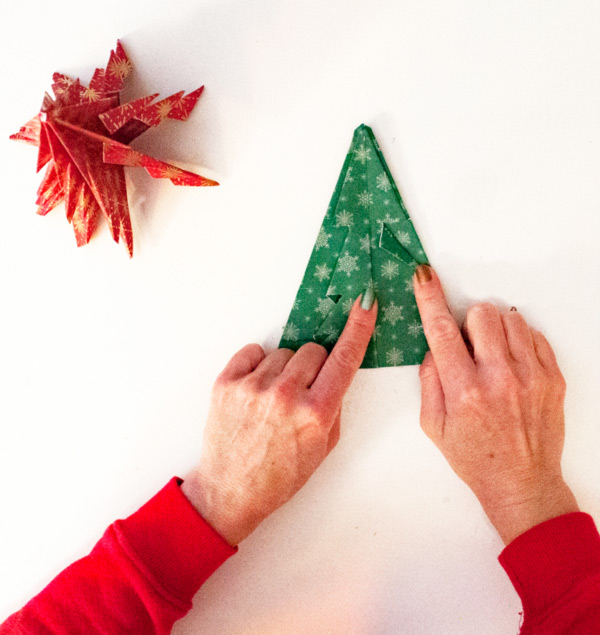
Step 11: Beginning on the right side, fold each cut line down to make a small triangle. This motion is similar to ‘ear marking’ a book page. Do this fold for each of the three cuts.
Step 12: Release the top layer by folding it from right to left, like a book page. Repeat folding down each cut line on the right side until you reach the bottom layer.
Step 13: When you have folded down each cut line on the right side, flip the entire paper over. Repeat folding the cut lines on this side.
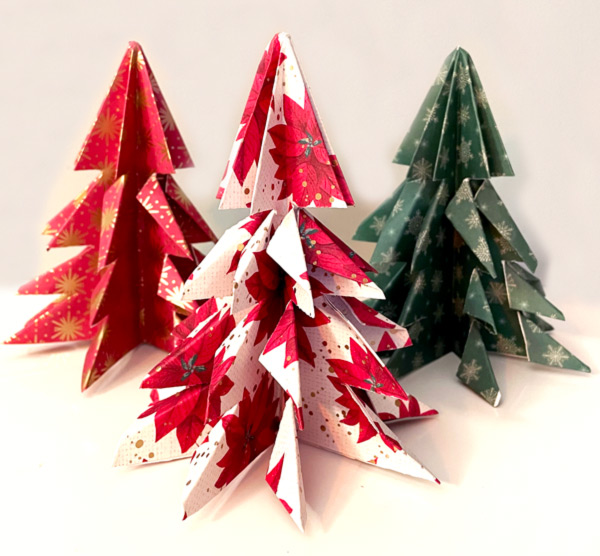
Step 14: After folding all the cut lines, gently open up the tree!
Ideas to take kirigami winter trees to the next level:
- Decorate the trees! Add crumbled-up pieces of tissue paper to imitate ball-shaped ornaments. Add glue and glitter to add sparkle that looks like freshly fallen snow.
- String the trees together to make a garland. Punch a small hole in the top of each tree and string a piece of twine through it.
- Experiment with different types of paper, such as wrapping paper, hand drawings on paper, watercolored paper, cardstock, construction paper, newspaper, and washi paper.
Learning and Discussion Questions:
1. What is kirigami? Kirigami is the Japanese art or technique of cutting and folding paper into objects or designs. Kirigami can be two-dimensional or three-dimensional.
Contemporary artists are keeping the tradition of kirigami alive. Visit the following Instagram pages to view and follow artists practicing kirigami:
@bearfollowscat
@zaidivecha
@katysuedesignscrafts
@kiriesousakukamasayo
@abemanatee
@eugenia_zoloto
@icarus.mid.air
2. Why do evergreen trees stay green in the winter? Watch this short video from the Dickinson County, Iowa Nature Center (@DCCBnaturecenter) to find out!
Thank you to our sponsor, PNC Arts Alive!, for helping to make this video possible!


