Foil Embossing
Metal embossing is a decorative technique in which a design is raised on the surface of a metal sheet by applying pressure from the back side, causing the metal to push outward and create a three-dimensional effect. This can be done using tools like styluses, hammers, or presses, and the process may involve tracing a pattern or freehand drawing directly onto the metal. The metal used is often soft and malleable, such as copper, aluminum, or tin. In this activity, we use aluminum foil, yarn, and cardboard to create the aesthetics of metal embossing without the need for specialized tools.
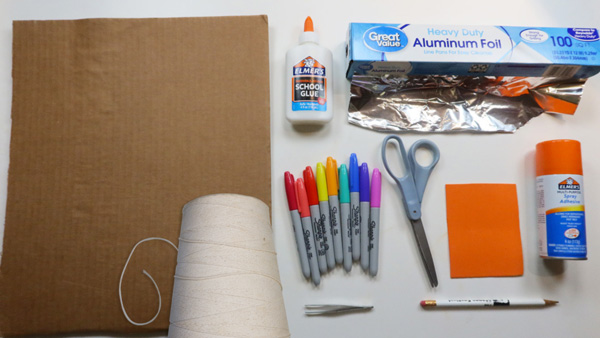
Materials:
- Cardboard (8”x10” or smaller)
- Pencil
- Scissors
- Elmers Glue
- Yarn
- Tweezers
- Heavy Duty Aluminum Foil
- Elmers Spray Adhesive
- Small Felt Square
- Colored Sharpie Markers
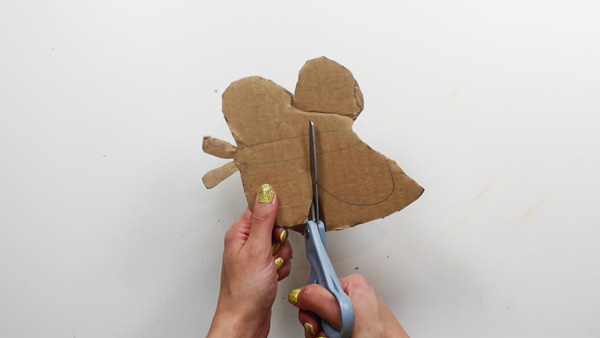
Step 1: Sketch a design, either representational or abstract, onto the cardboard using a pencil.
Step 2: Cut the piece of cardboard into the desired shape.
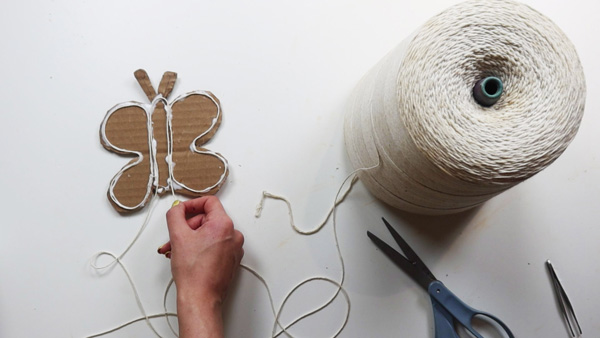
Step 3: Once the drawn design is complete, trace one line with glue and then carefully place a piece of yarn onto the glue. If necessary use tweezers to place the yarn.
Step 4: Continue to apply glue and yarn to the design.
Step 5: Allow the glue to dry.
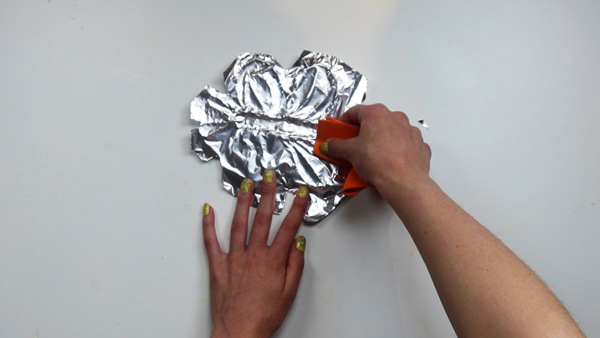
Step 6: Cut a piece of aluminum foil about one inch larger than the cardboard.
Step 7: Spray one side of the aluminum foil with adhesive. Place the foil, sticky side down onto the cardboard.
Step 8: Starting from the center, use a small square of felt to rub the aluminum foil over the yarn pattern. It is important to go slowly with this step.
Step 9: Wrap the remaining foil around the edge towards the back of the cardboard.
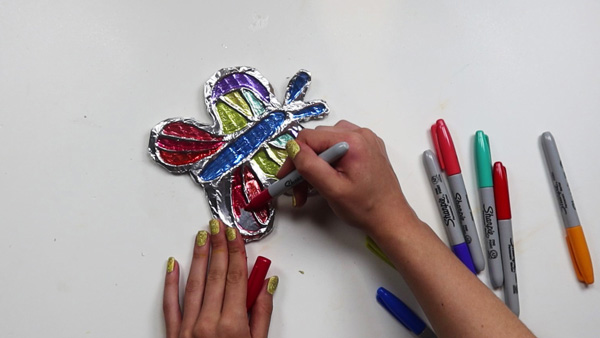
Step 10: Use colored Sharpies to color the low areas of the foil. Keep the raised lines free of color.
Ways To Take Foil Embossing To The Next Level:
- Incorporate Mixed Media Elements: Add additional materials like fabric, beads, or textured papers to your design. By layering these materials under or over the foil, you can create more intricate and multi-dimensional effects, enhancing the complexity and visual interest of the project.
- Experiment with Color and Patinas: Instead of just using Sharpies, try applying alcohol inks, acrylic paints, or even metallic patinas to the foil surface. This will allow for a broader range of colors and finishes, giving your piece a more dynamic and sophisticated appearance.
- Create Larger Collaborative Artworks: Expand the project by working on a larger scale, such as creating a mural-sized embossing piece where each participant contributes a section. This can foster collaboration and result in a more impactful and communal artwork that can be displayed in a public or community space.
- Integrate Lighting Effects: Introduce LED lights or other light sources behind or around the foil embossing. The interaction between light and the reflective surfaces of the foil can create stunning visual effects, adding depth and drama to the finished piece, and making it a striking centerpiece in any setting.
Further Learning and Discussion Questions:
– What challenges did you encounter while tracing your design with yarn, and how did you overcome them? How does this step influence the final embossed effect?
– How do the textures created by the yarn and foil impact the overall design? What creative choices did you make to enhance these textures in your artwork?
– In what ways could you experiment with different patterns or materials (such as different types of yarn or colored foils) to achieve varied artistic effects in your embossing project?
– Reflecting on the entire process, what did you find most satisfying about creating an embossing-like effect with these materials? How might this project inspire you to explore other non-traditional art techniques?
WheatonArts Family Art Workshop video tutorials are presented by PNC Arts Alive!