Agamographs
Learn to make an agamograph! An agamograph is a type of image that shows two different pictures depending on the angle from which it is viewed. It is created by interlacing two images and then folding the paper into a series of vertical accordion-style pleats. When you look at the Agamograph from one side, you see one image, and from the other side, you see the alternate image. In this workshop, you will learn to use original drawings to create an agamograph. For those who would like to take this to the next level, we will guide you through drawing a unique agamograph.



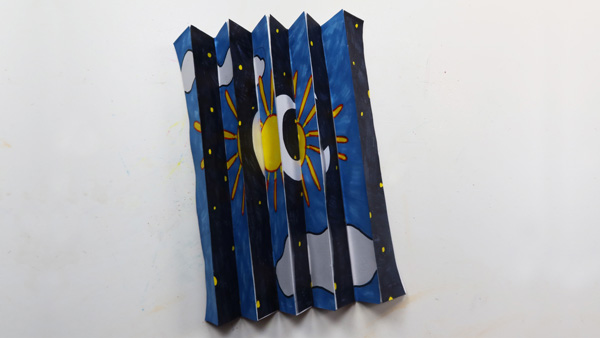
Materials
- Crayons, Markers, or Colored Pencils
- Two Sheets of Drawing Paper
- Ruler
- Pencil
- Glue Stick
Instructions
Step 1: Choose two sheets of paper. One will be the background and the other will have two images. Put the background sheet aside.
Step 2: Fold the other sheet in half widthwise. Cut along the fold.
Step 3: Place the two sheets in the same orientation. For example, place each one in a vertical orientation.
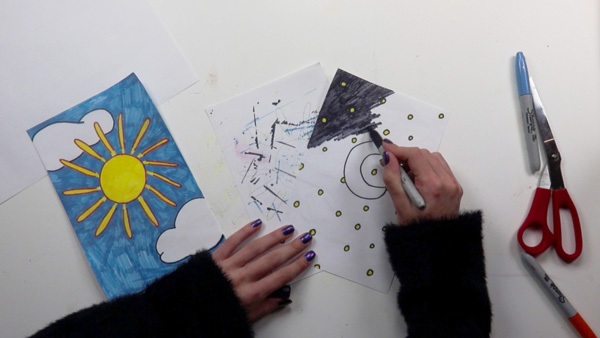
Step 4: Draw two separate images on each paper. Reminder to place the papers in the same orientation!
TIPS:
- Consider how your two images relate to each other. Will one image transform into the next? For example, in one image will you have a frog and the other a prince? Will one image be a human and the other a werewolf?
- Make sure the drawings are bold!
- Use contrasting colors.
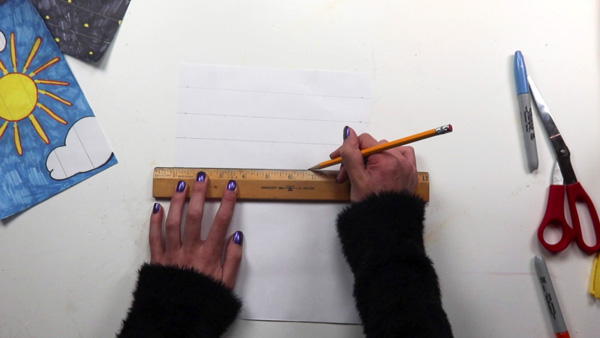
Step 5: Prepare to assemble the agamograph! Measure one-inch sections across the length of the background paper. Be sure to make your one-inch marks at the top and bottom of the sheet. This will help you draw a straight line with the ruler.
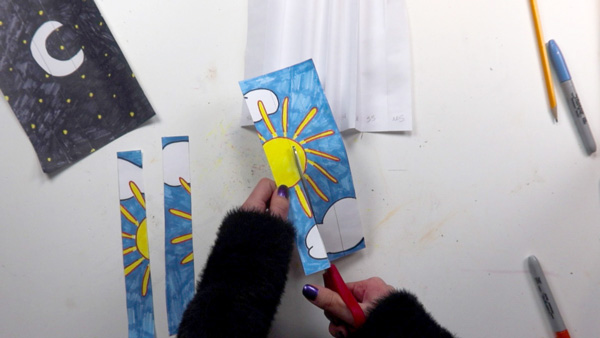
Step 6: Cut your images! Flip your drawings so the back is facing up. Use a ruler to measure one-inch, equal strips. Carefully draw a line, using your ruler. Then, cut along your line. Repeat this for each drawing
TIP: At this point, it may be helpful to label the back of each strip. For example, if this is a drawing of a frog, write “F1”, “F2”, “F3”, “F4”, and so on, on the back of each strip before cutting the drawing.
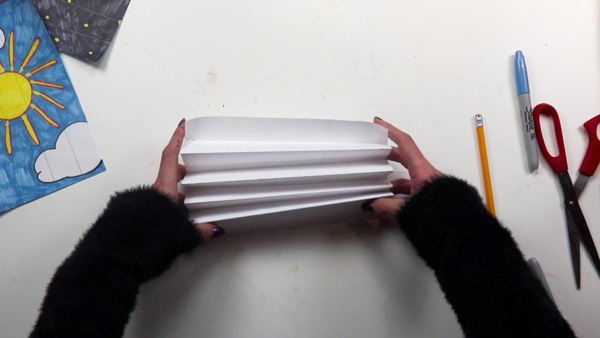
Step 7: Fold your background paper. The folds will be accordion-style. Fold on the first line. Then, flip the paper over and fold it in the opposite direction on the next line. Repeat this process until all lines have been folded.
TIP: Use the edge of a pencil to crease the paper. This creates a sharp, crisp fold.
Step 8: Assemble the agamograph! Gather the strips from the first drawing. Beginning on the left side, lay each drawing strip on every other blank accordion strip. They should all be on the left side of the accordion.
Step 9: Use a glue stick to adhere each drawing strip to the background.
Step 10: Once the first drawing is glued down, gather the strips of the second drawing. Beginning on the left, glue each strip to the background. All of these strips should be on the right side of the accordion folds.
Ways to take your agamograph to the next level:
- Incorporate Mixed Media: Instead of using just crayons, markers, or colored pencils, introduce additional materials such as tissue paper, fabric, or magazine cutouts to create a textured, multimedia agamograph. This adds a tactile element to the artwork and allows for more creative expression through layering different materials.
- Narrative Agamograph Series: Instead of creating just one agamograph, design a series of agamographs that tell a sequential story when viewed together. Each agamograph can represent a different part of the story, with the viewer moving from one piece to the next, revealing different phases of the narrative through their perspective.
- Large-Scale Collaborative Agamograph: Scale up the project by inviting a group to work together to create a large, mural-sized agamograph. Each person can be responsible for a portion of the overall image, and when combined, the agamograph would present a collaborative artwork that changes as viewers walk alongside it.
Further Learning and Discussion Questions:
Discussion questions for reflection:
– How do the two images you created for your agamograph relate to each other, and why did you choose this specific combination?
– What challenges did you encounter when folding the background paper or cutting the strips, and how did you overcome them?
– In what ways do you think the agamograph, as a form of kinetic art, changes how viewers interact with the artwork?
– How do you think the idea of transformation, like a frog turning into a prince, can be used to tell stories or convey messages in an agamograph?
Further Learning:
– The agamograph is named after the artist, Yaacov Agam. Agam is best known for his pioneering work with kinetic art. Watch this brief video to see Agam activating his sculptures. https://www.youtube.com/watch?v=Qw9dBKcpARw&t=86s

